


How to Install a Custom Range Hood: A Complete Guide

How to Install a Custom Range Hood: A Complete Guide
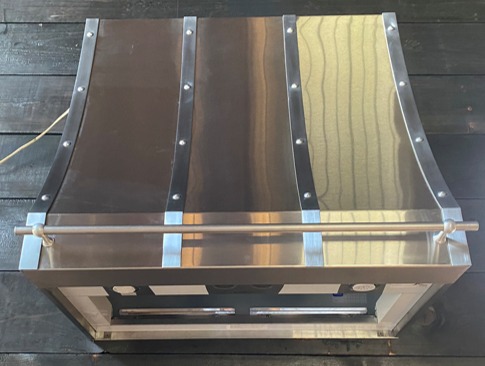
A custom range hood is one of the most architecturally significant elements in a kitchen. It commands the room, anchors the cooking space, and — when it is crafted from copper or brass — it only becomes more beautiful with time. But even the finest handmade hood requires a proper installation to perform as it should. Poor mounting, undersized ductwork, or incorrect electrical connections will compromise both function and longevity.
This guide walks through every stage of the process — from pre-installation planning to the final test run — so that you, your contractor, or your installer arrives on the day with clarity and confidence.
Please note: The information in this guide reflects Amoretti Brothers' general recommendations based on our installation experience. It is provided as a reference only and does not substitute for professional advice. Installation requirements vary depending on your specific kitchen, wall construction, ductwork configuration, motor brand, and local building codes. We always recommend hiring a licensed contractor or certified installer for any range hood installation. Amoretti Brothers assumes no responsibility for installations carried out without professional supervision.
Before You Begin: What to Have Ready
Custom range hoods are heavier than standard hoods. A copper wall-mount hood can weigh anywhere from 60 to over 150 pounds depending on size and gauge. Before installation day, confirm the following:
Structural support. Wall-mount hoods must be anchored into wall studs or a reinforced blocking board. If your studs do not align with the hood's mounting points, a licensed contractor should install a horizontal blocking board between studs before the hood arrives.
Ductwork route. Your duct run should be planned before the hood is ordered, not after. Ideally, ductwork runs the shortest possible path to the exterior — straight up through the ceiling or horizontally through an exterior wall. Every bend in the duct reduces airflow efficiency. For hoods rated at 600 CFM or above, use a minimum 6-inch round duct or 3.5" x 10" rectangular equivalent. Larger CFM ratings may require 8-inch or 10-inch duct.
Electrical supply. Most range hood blowers require a dedicated 120V circuit. Confirm with your electrician before installation. The outlet or hardwire connection should be located as close to the hood's centerline as possible, ideally hidden inside the chimney chase.
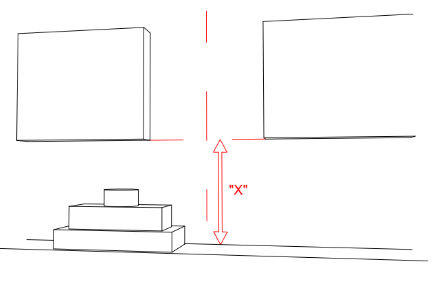
Height above the cooking surface. The standard installation height for a range hood is 28 to 36 inches above an electric cooktop, and 24 to 30 inches above a gas range. Higher placement reduces capture efficiency; lower placement risks heat damage to the hood itself. For custom copper and brass hoods, we recommend the midpoint of these ranges — 30 to 32 inches — for the best balance of performance and visual proportion.
Tools and Materials
- Power drill and drill bits
- Level (48-inch recommended)
- Stud finder
- Tape measure
- Pencil and painter's tape
- Aluminum HVAC tape (not standard duct tape)
- Wall anchors and cabinet screws or structural lag screws
- Hole saw or jigsaw (for duct penetration)
- Safety glasses and work gloves
- A second person — essential for lifting
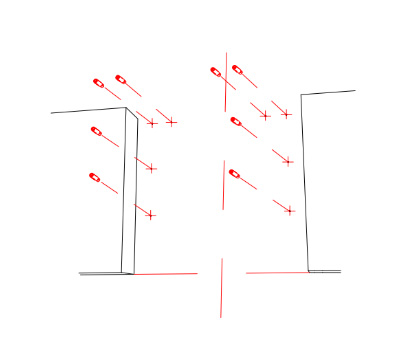
Step 1: Mark the Centerline
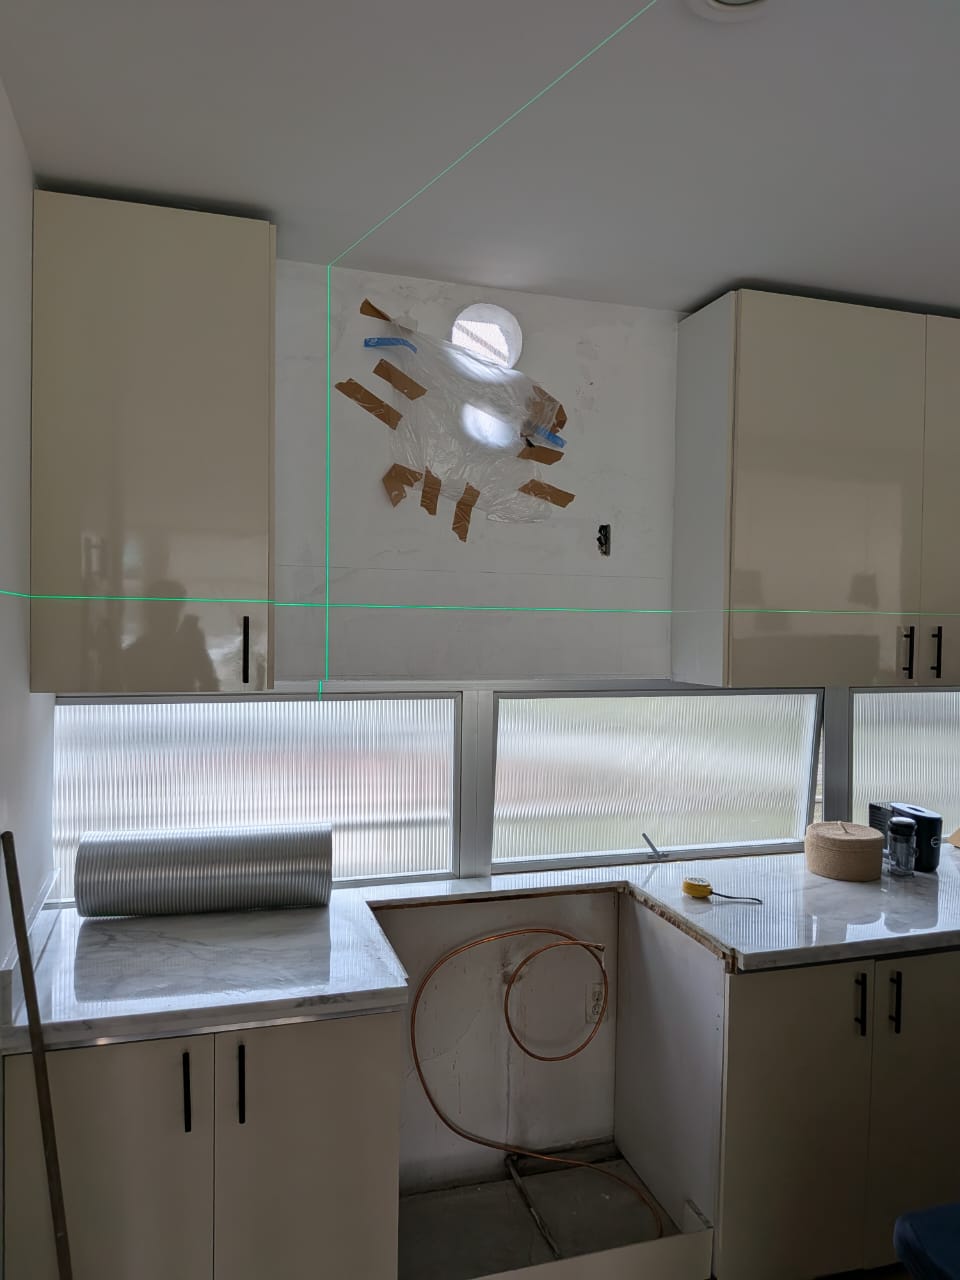
Begin by finding the center of your cooktop and extending a vertical line up the wall using a level. This is your reference for everything that follows. Mark it clearly with painter's tape. All measurements — hood position, duct location, electrical supply — reference this line.

Step 2: Locate and Mark the Studs
Use a stud finder to locate the studs on either side of the centerline. Mark their positions with painter's tape extending from the mounting height upward. If studs are not aligned with the hood's mounting holes, install a blocking board — a horizontal piece of dimensional lumber secured between the studs — at the mounting height before proceeding.
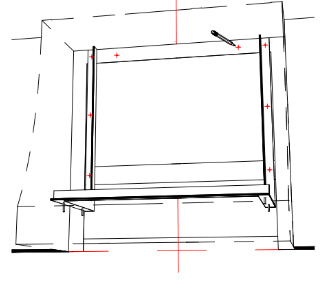
Step 3: Mark the Bottom of the Hood
Measure up from the cooktop surface to your chosen installation height (30 to 32 inches is typical). Mark this height on the wall at the centerline. Use a level to extend a horizontal line across the full width of the hood. This line represents the bottom edge of the hood and is your primary alignment reference.
A useful installer's trick: nail a temporary 1x4 board along this line, level it carefully, and use it as a ledge to rest the hood while securing it. This frees both hands for drilling and prevents the hood from shifting during mounting.
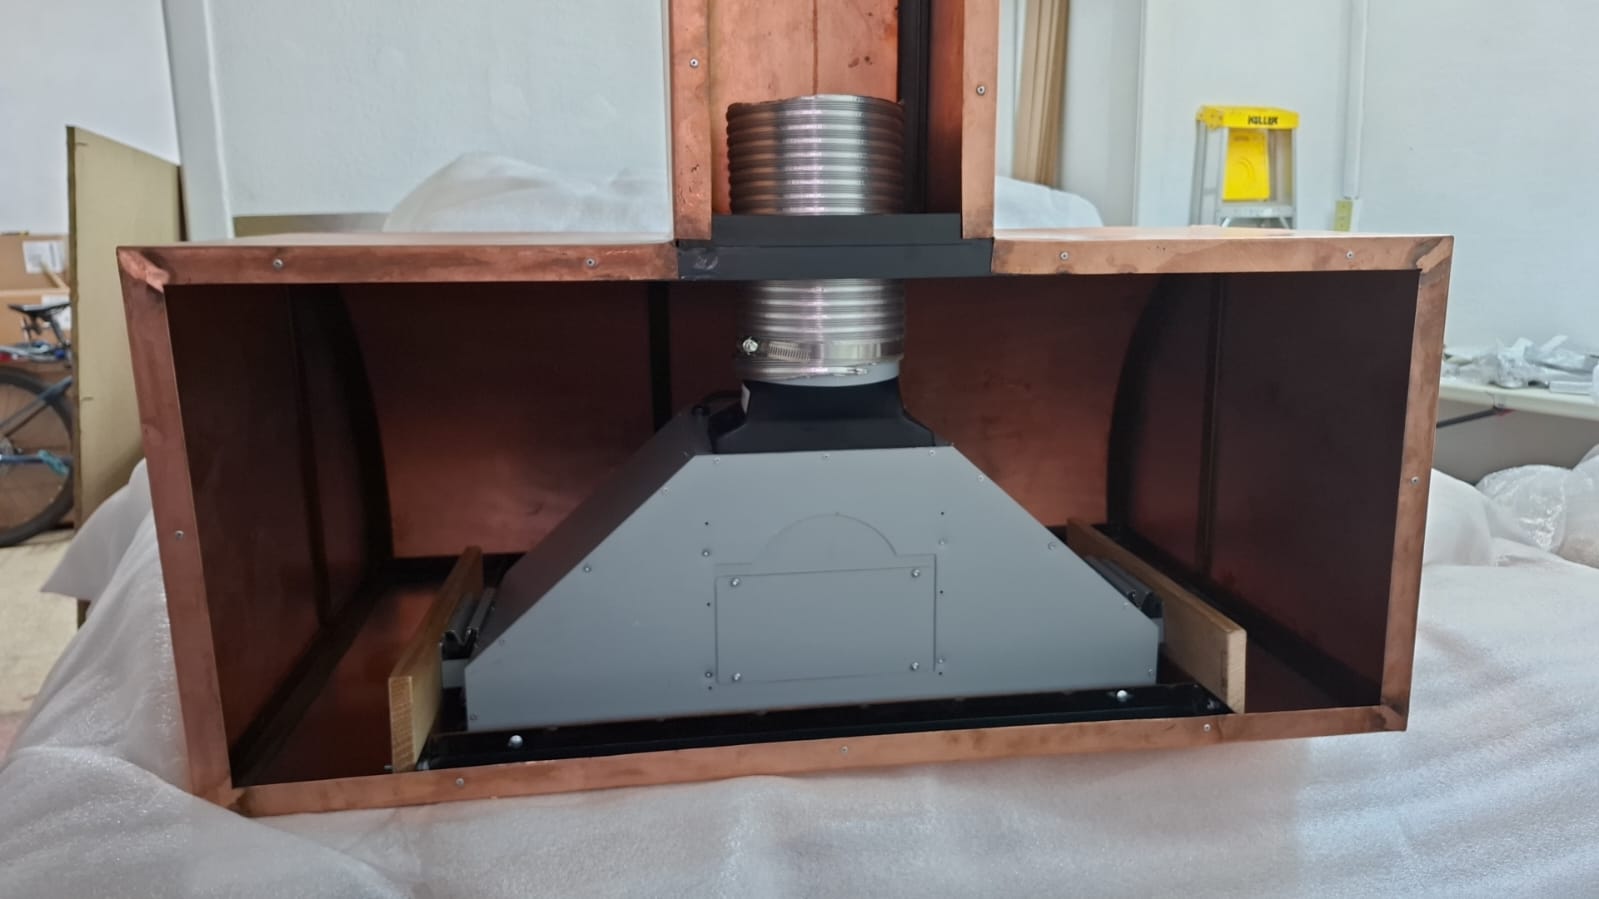
Step 4: Prepare the Ductwork Opening
Before mounting the hood, cut the duct penetration through the wall or ceiling. The opening should be sized to your duct diameter with approximately ¼ inch of clearance. Feed the duct collar through the opening so it is accessible from inside the chimney chase once the hood is in place.
If your hood is being installed against an interior wall with a ceiling run, the duct should be roughed in above the ceiling before installation day. Work with your HVAC contractor to ensure the duct terminates at the exterior with a proper backdraft damper — this prevents outside air from entering the kitchen when the hood is off.
Step 5: Mount the Hood
With your temporary ledger board in place and at least two people on hand, lift the hood into position. Rest it on the ledger and align the centerline of the hood with the centerline marked on the wall.
Pre-drill pilot holes through the hood's back panel or mounting flanges and into the wall studs or blocking board. Drive 3-inch cabinet screws or lag screws to secure the hood firmly. Check level in both directions before fully tightening.
For copper and brass hoods, keep the protective plastic wrap on the exterior until installation is complete. Metal surfaces scratch easily during handling.
.jpeg)
Step 6: Connect the Ductwork
With the hood secured, connect the blower's duct collar to the supply duct. Use aluminum HVAC tape — not standard duct tape, which degrades over time — to seal every joint. An airtight duct connection is essential: even small gaps reduce airflow efficiency and can allow grease-laden air to accumulate inside wall cavities.
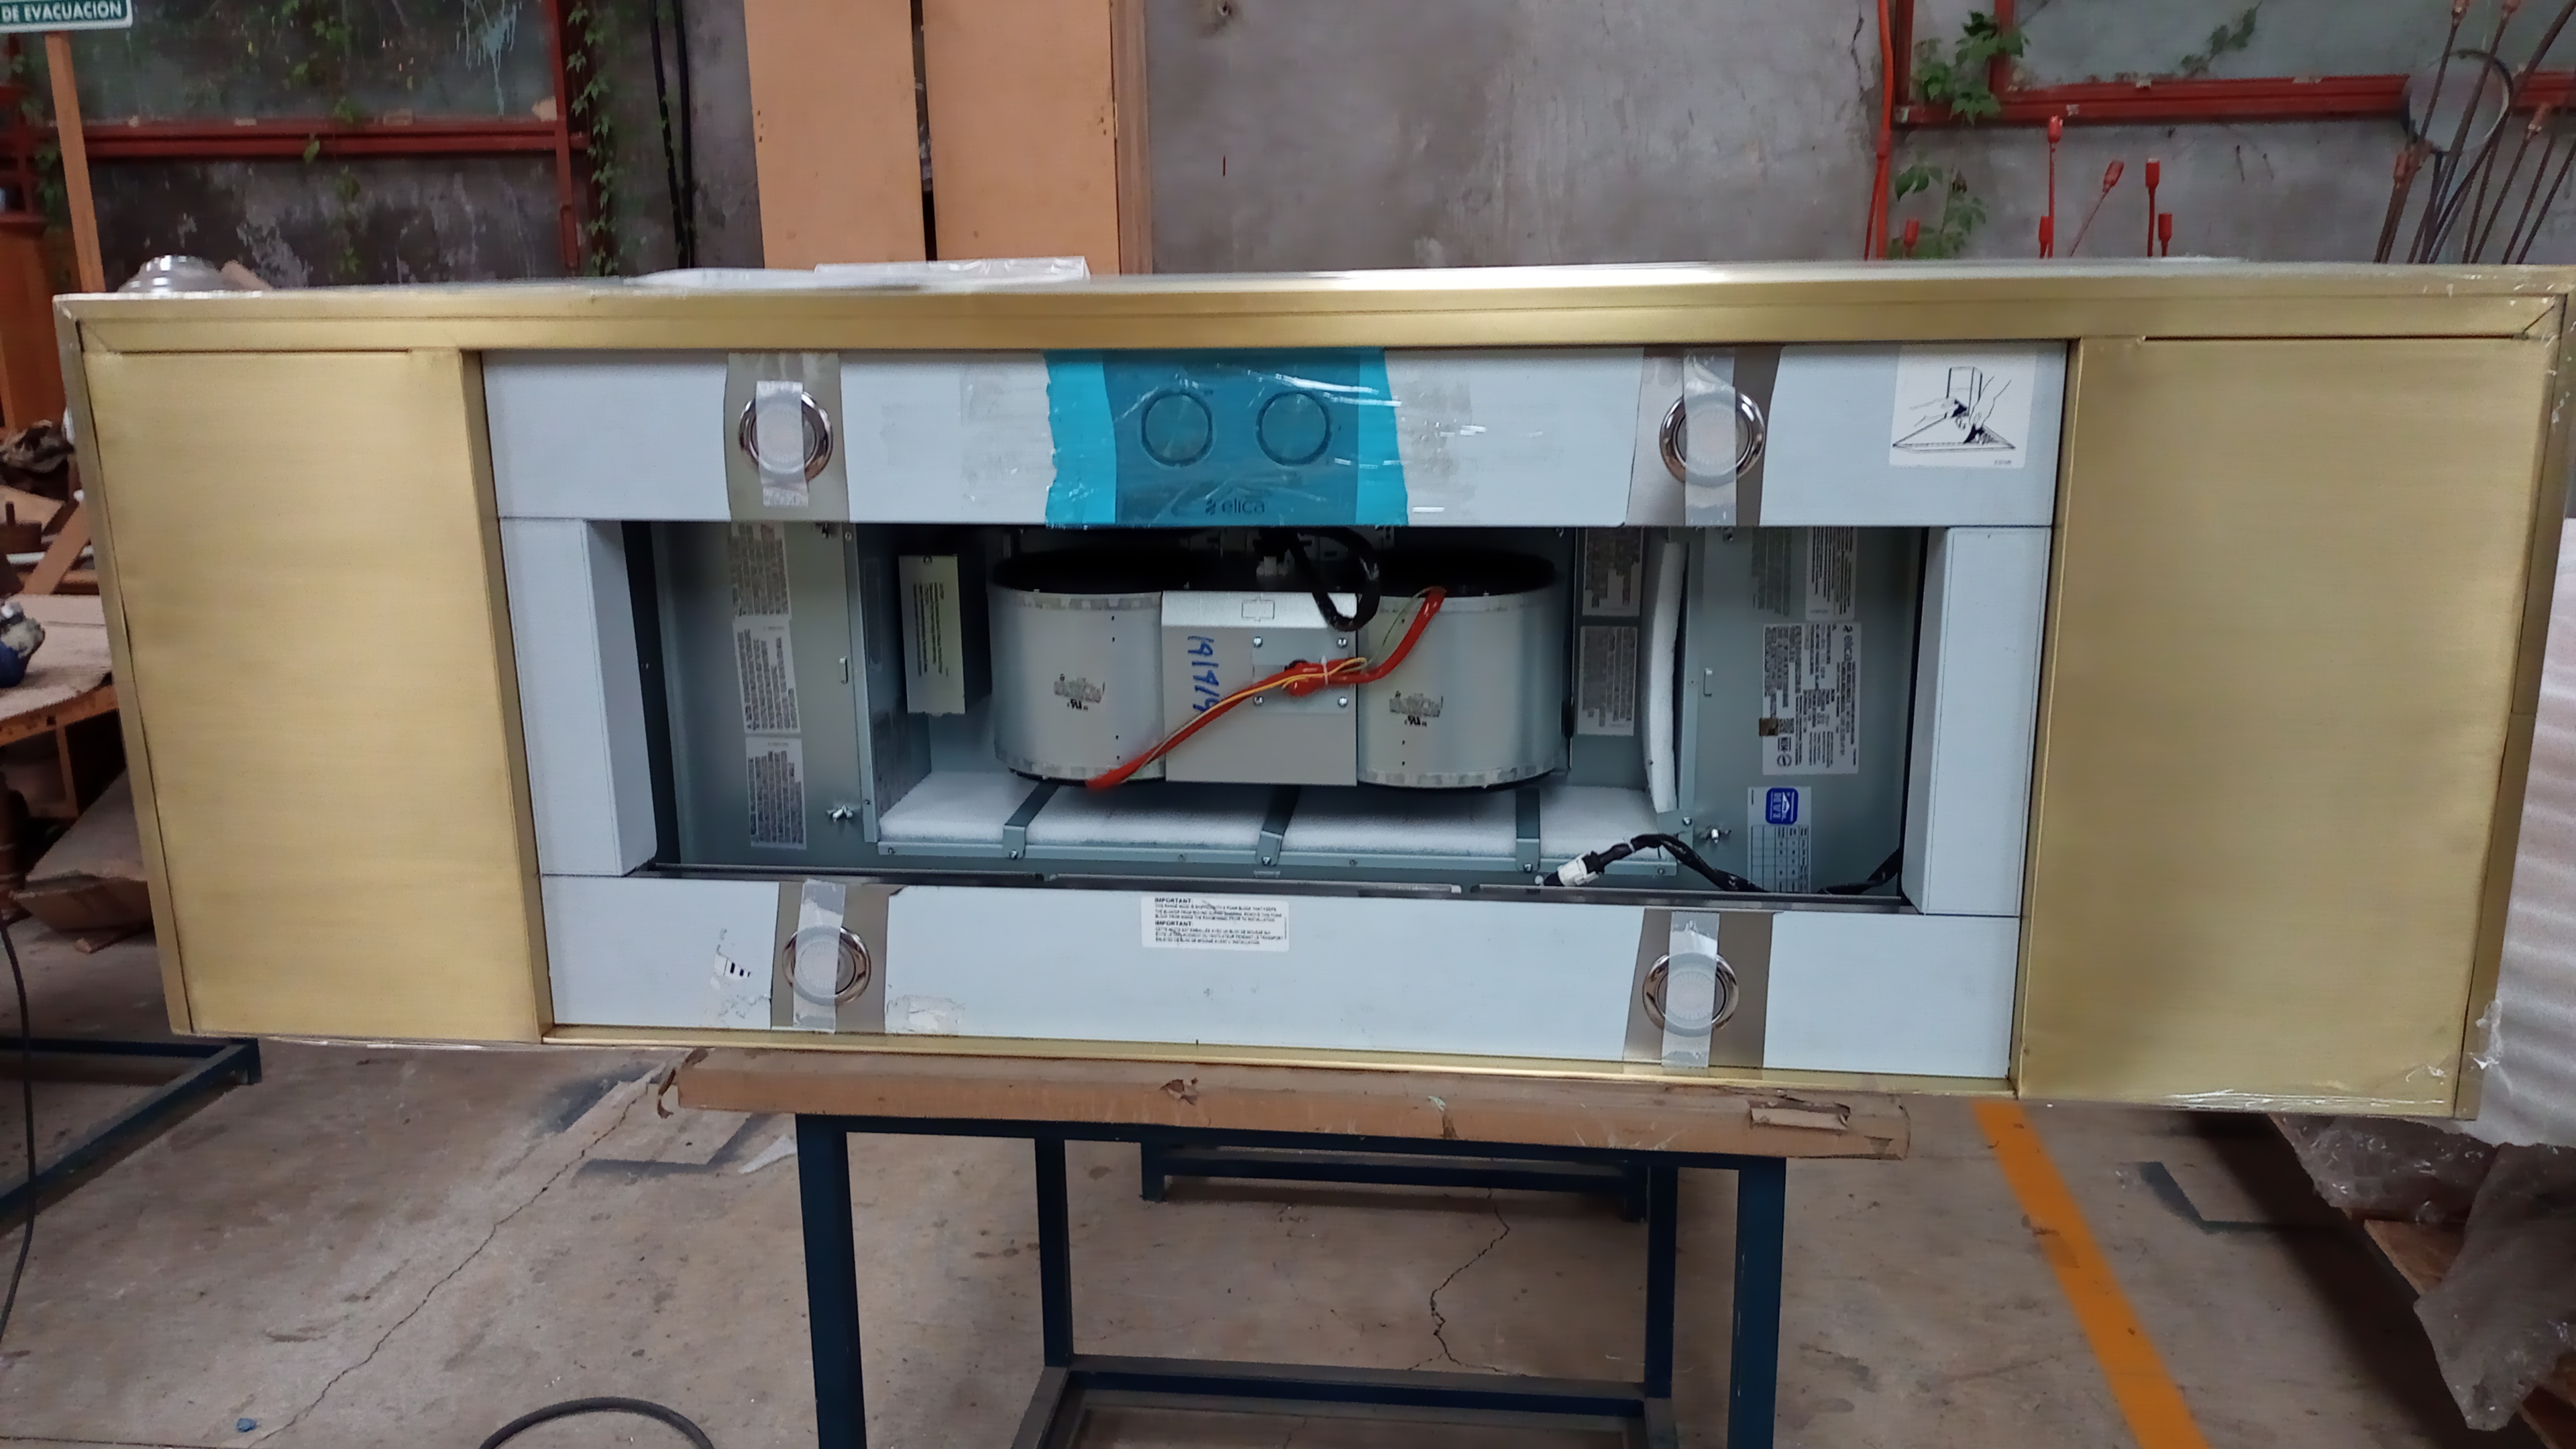
If your hood has a removable blower for duct access (most custom hoods do), remove the blower before connecting the duct, then reinstall it once the connection is complete and sealed.
Step 7: Electrical Connection
A licensed electrician should complete all wiring. For plug-in connections, the outlet should be concealed inside the chimney chase and accessible for future servicing. For hardwired installations, the supply line is typically run through the back of the hood before it is mounted.
Confirm that the circuit breaker is off before any electrical work begins, and that the circuit is restored only after all connections are complete and the panel covers are in place.
Step 8: Install the Ventilation System
It is important to note that the ventilation system installation inside the hood varies depending on the motor brand supplied with your unit — each manufacturer has specific requirements for how the internal components connect, so always refer to the documentation included with your motor before proceeding.
Use rigid metal duct wherever possible — flexible duct reduces airflow efficiency and can accumulate grease over time. Seal all duct joints with metal foil tape (not standard duct tape) to prevent air leaks.
If your installation is ductless/recirculating, this step involves installing the appropriate carbon filter cartridges in place of duct connection — refer to your specific motor brand's specifications for the correct filter type and fitting procedure.
Step 9: Install Filters and Test
Insert the filters — baffle filters for most professional-grade hoods — and restore power at the circuit breaker. Test all fan speeds and lighting functions. Hold a sheet of paper near the front edge of the hood and confirm that it is drawn toward the hood at full speed. This simple test confirms adequate capture velocity.
Listen for any unusual vibration or rattling. If present, check that all screws are tight and that the blower is seated correctly in its housing.

A Note on Professional Installation
A custom copper or brass range hood is a significant investment — one made to last a generation. We always recommend professional installation by a licensed contractor with HVAC and electrical experience, not because the process is beyond a skilled DIY installer, but because the consequences of an improperly mounted or vented hood are significant: reduced performance, moisture damage inside the wall cavity, and in rare cases, fire risk from inadequate clearances.
Every Amoretti Brothers range hood ships with a complete installation manual tailored to your specific model. If you have questions before or during installation, our design team is available visiting the contact us page.
Common Installation Mistakes to Avoid
Undersized ductwork. The most frequent cause of a noisy, underperforming hood. Match the duct diameter to the hood's CFM rating — do not reduce the duct size to make routing easier.
Too many bends. Each 90-degree elbow reduces airflow by the equivalent of several feet of straight duct. Plan the shortest, straightest route possible.
Mounting too high. A hood installed above 36 inches over the cooking surface loses significant capture efficiency. The cooking plume disperses before it reaches the hood.
Recirculating without a carbon filter. If you are not ducting to the exterior — in apartments or where exterior venting is not possible — ensure your hood is fitted with a proper carbon filter rated for your cooking style. Baffle filters alone do not capture odors without exterior venting.
Not sealing the duct joints. Every unsealed joint is a point of air and grease leakage. Aluminum tape every connection without exception.
A well-installed range hood should run quietly, capture effectively, and require nothing more than regular filter cleaning. Done correctly, it will serve the kitchen for decades — and in the case of a handcrafted copper hood, it will grow more beautiful with every year of use.
Amoretti Brothers designs and handcrafts custom copper and brass range hoods, made to order in Mexico City. Each hood ships with a full installation manual and installation guidance from our design team. View our range hood collection →